
Holiday Wrapping DIYs
/
I'm teaming up with Candice Hackett of Ivy and Tweed to bring you lots of holiday DIYs this season. Candice graciously offered to photography a variety of projects I'm completing. See previous post on DIY embossing here.
Gift giving is one of my love languages, and wrapping up the gift is just as fun for me as thinking of the perfect item. These three DIY gift wrappings are sure to get you started on some creative ways to wrap your presents this holiday.
BLACK PAPER + CALLIGRAPHY TAG

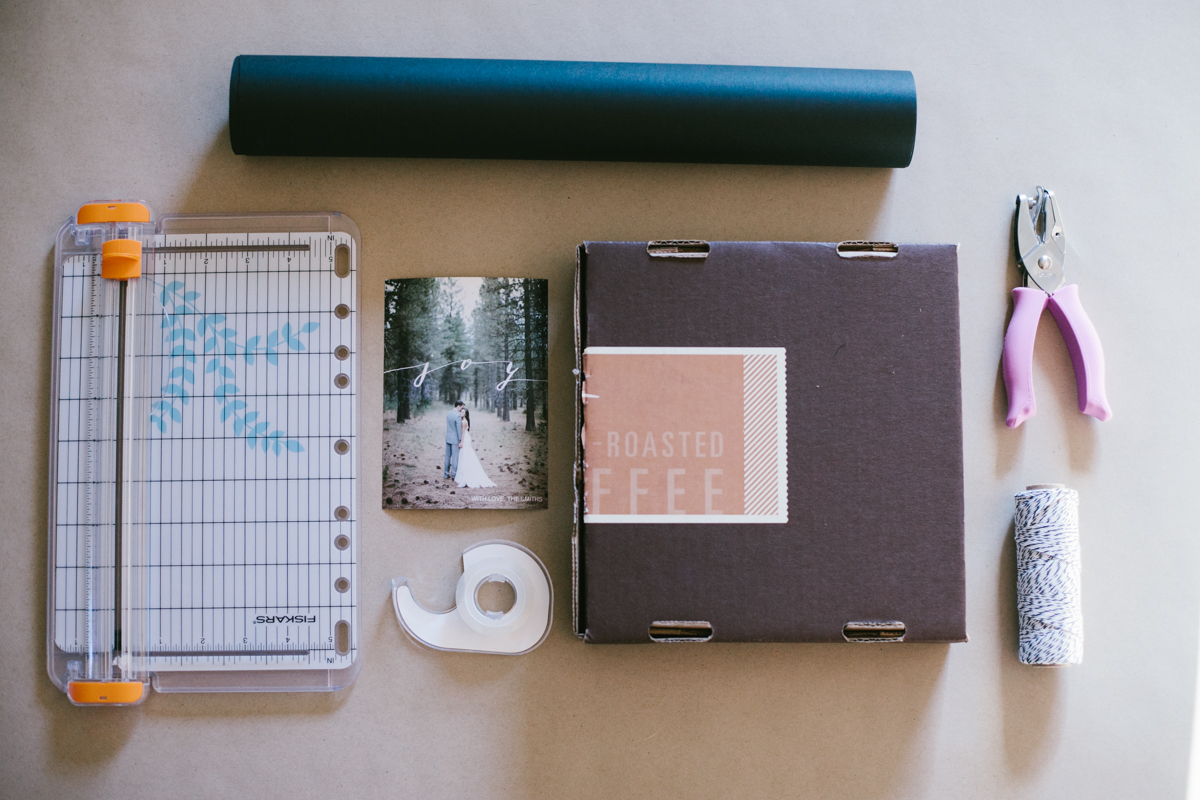
Supplies needed: hole punch, paper cutter, scissors, tape, edge rounder (optional for corners), baker's twine, gift tag or other calligraphy/lettered art in a holiday saying.
Step 1: Wrap gift in black paper.
Step 2: Cut out lettered phrase (this Christmas card of "JOY" is hand-calligraphed by me and available in my etsy shop)
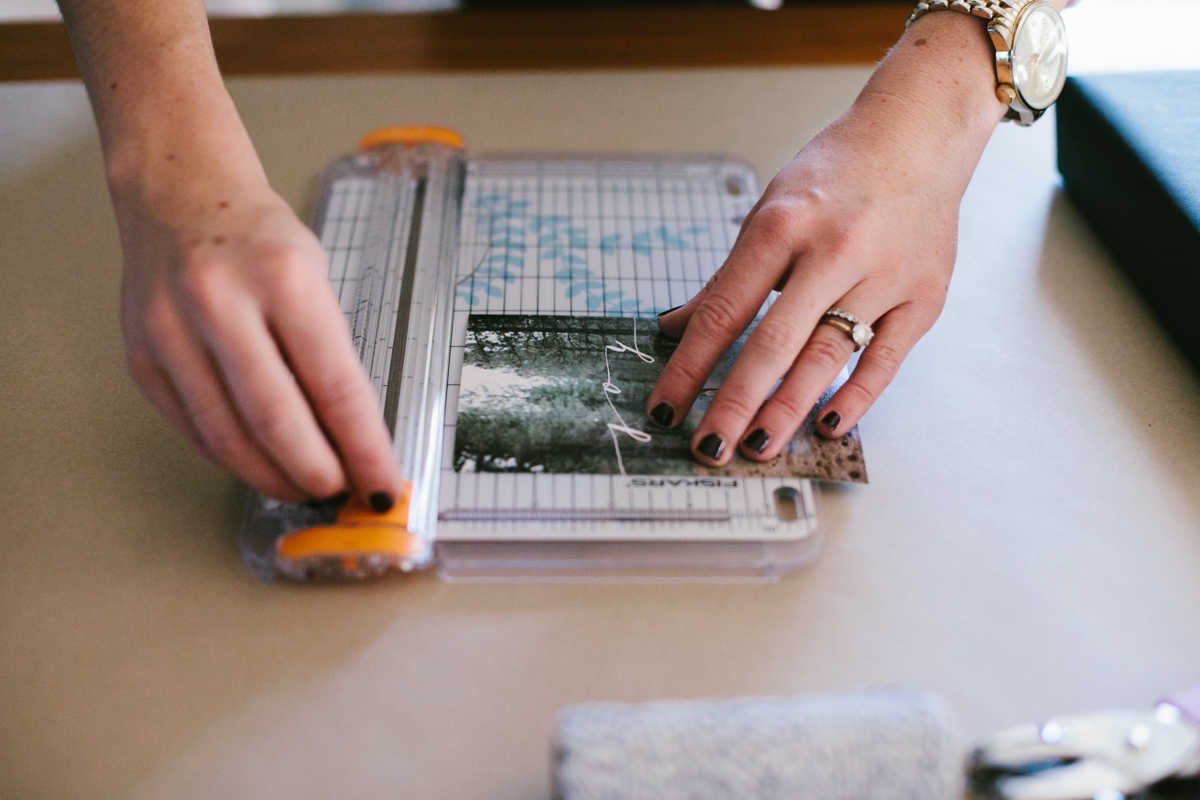
Step 3: Hole punch photo and string baker's twine through.

Step 4: Tie around gift.
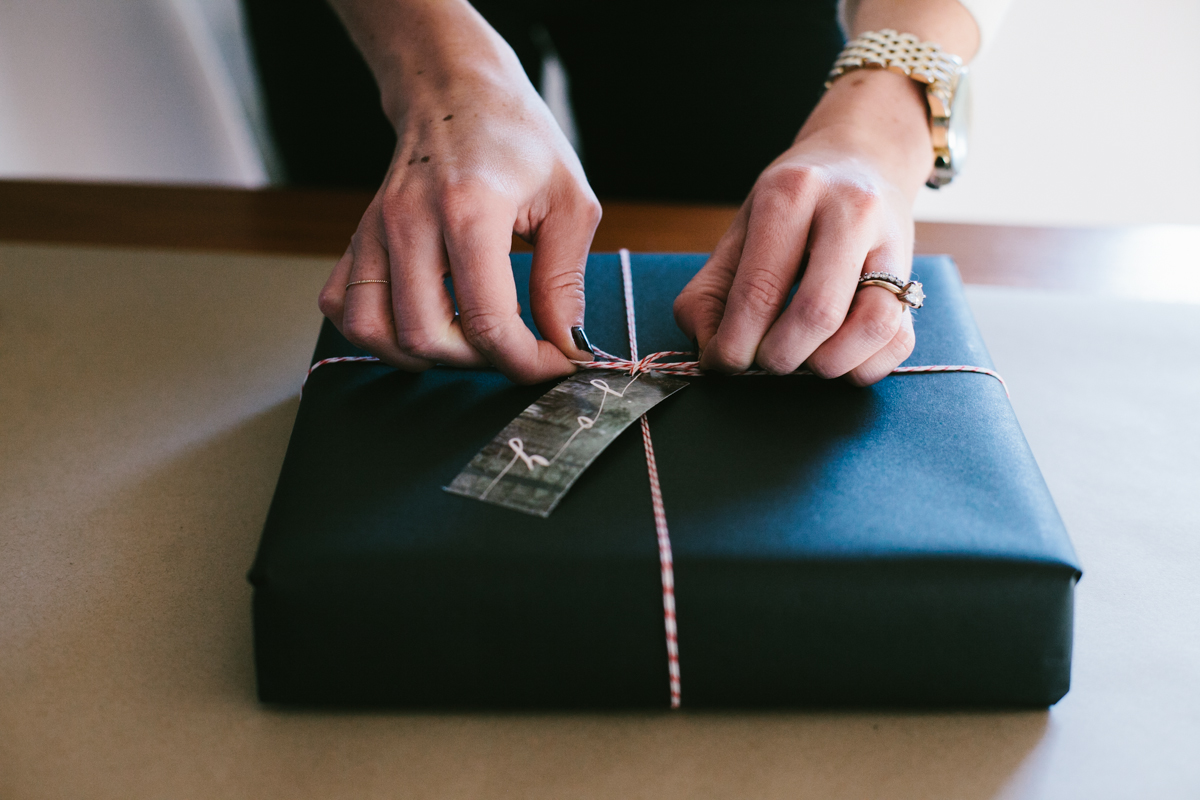
Step 5: round corners if desired.

Simple but elegant!
HOLIDAY STAMP WRAP

Supplies needed: holiday stamp (available here), scissors, tape, kraft wrapping paper, baker's twine, baby's breath (not pictured, I added it in later)
Step 1: Stamp in an "non-perfect" pattern all over your paper. Re-ink your stamp periodically to get the "ombre" effect.


Step 2: wrap with twine and add baby's breath! So simple.
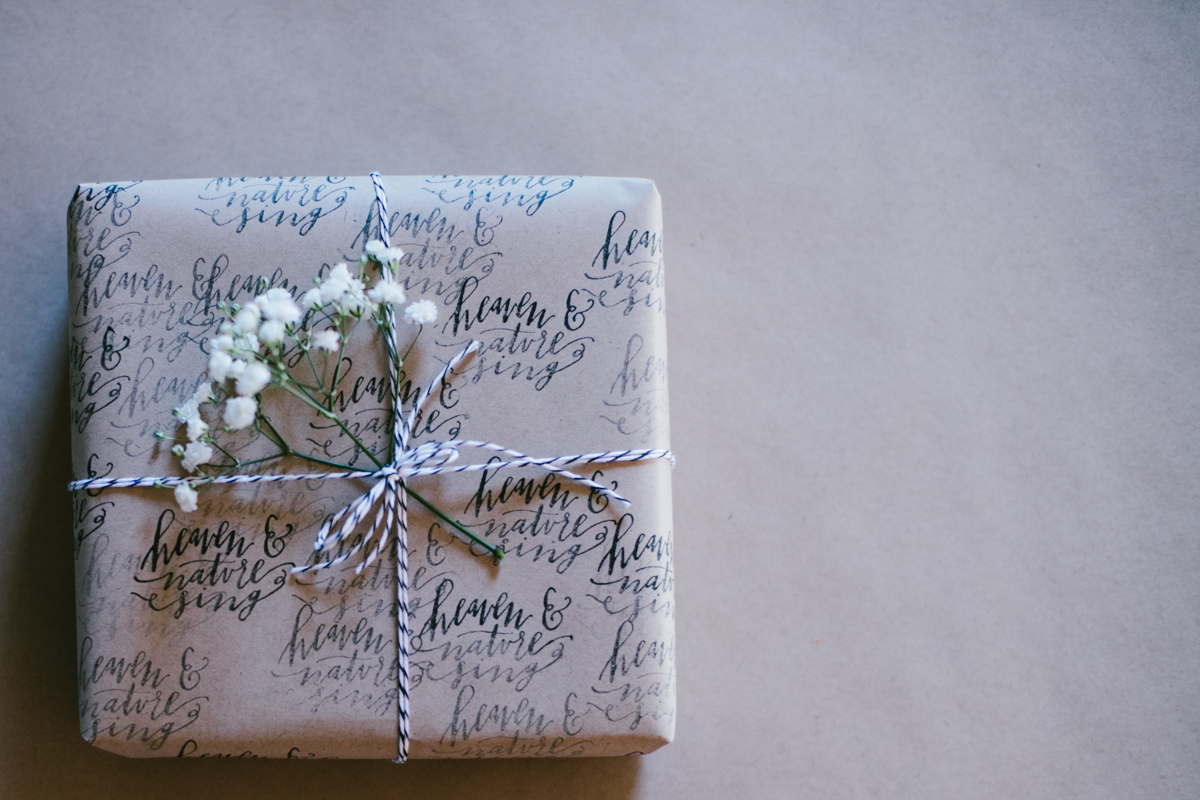
PHOTO ON KRAFT
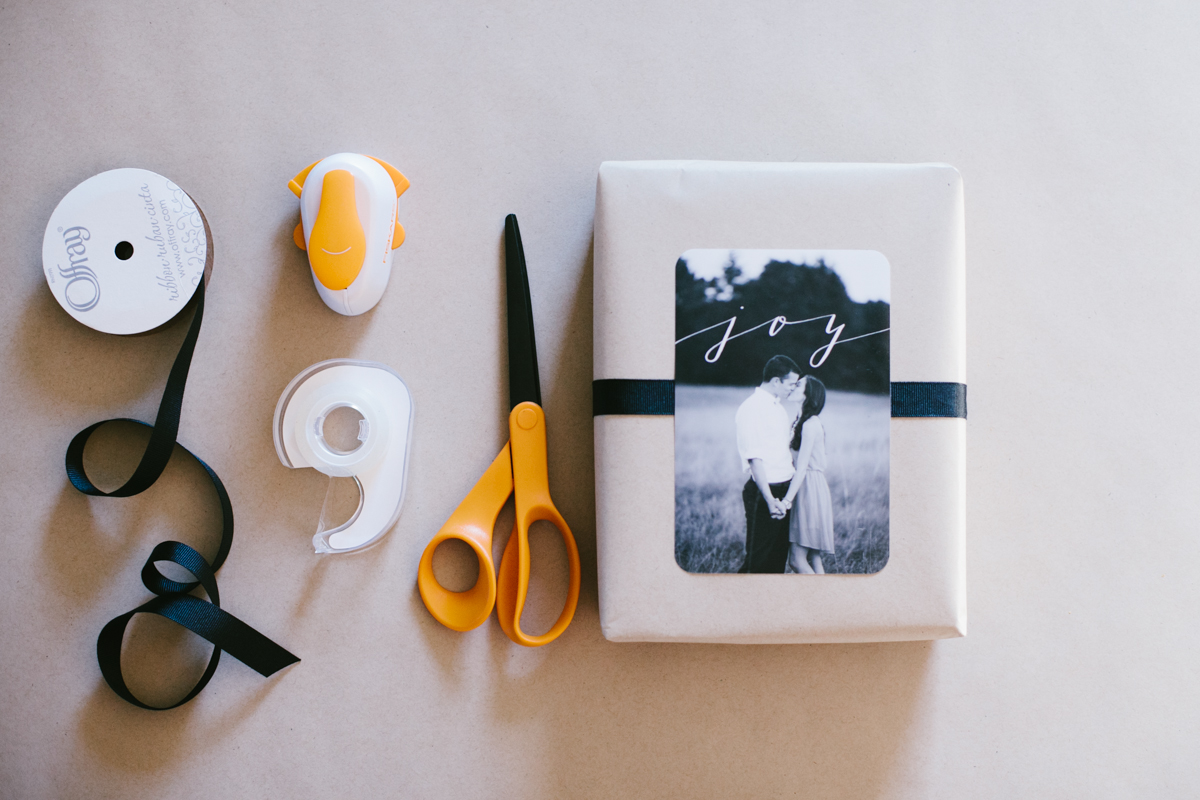
Supplies needed: photo, paper cutter, tape, baker's twine, hole punch, paper

Step 1: wrap with paper

Step 2: wrap a grosgrain ribbon around the box and tape in place.
Step 3: round corners of photo and tape on.

Another amazingly simple, yet thoughtful and well-designed, holiday wrap!

Proof that simple is beautiful, and that it doesn't have to be red and green to be merry and bright.
Happy holidays!