DIY BATHROOM REMODEL

52B0E540-04C6-4416-B3F0-475C8F696E5F-D643208B-B665-4FA6-9176-A0B5134E5504.JPG

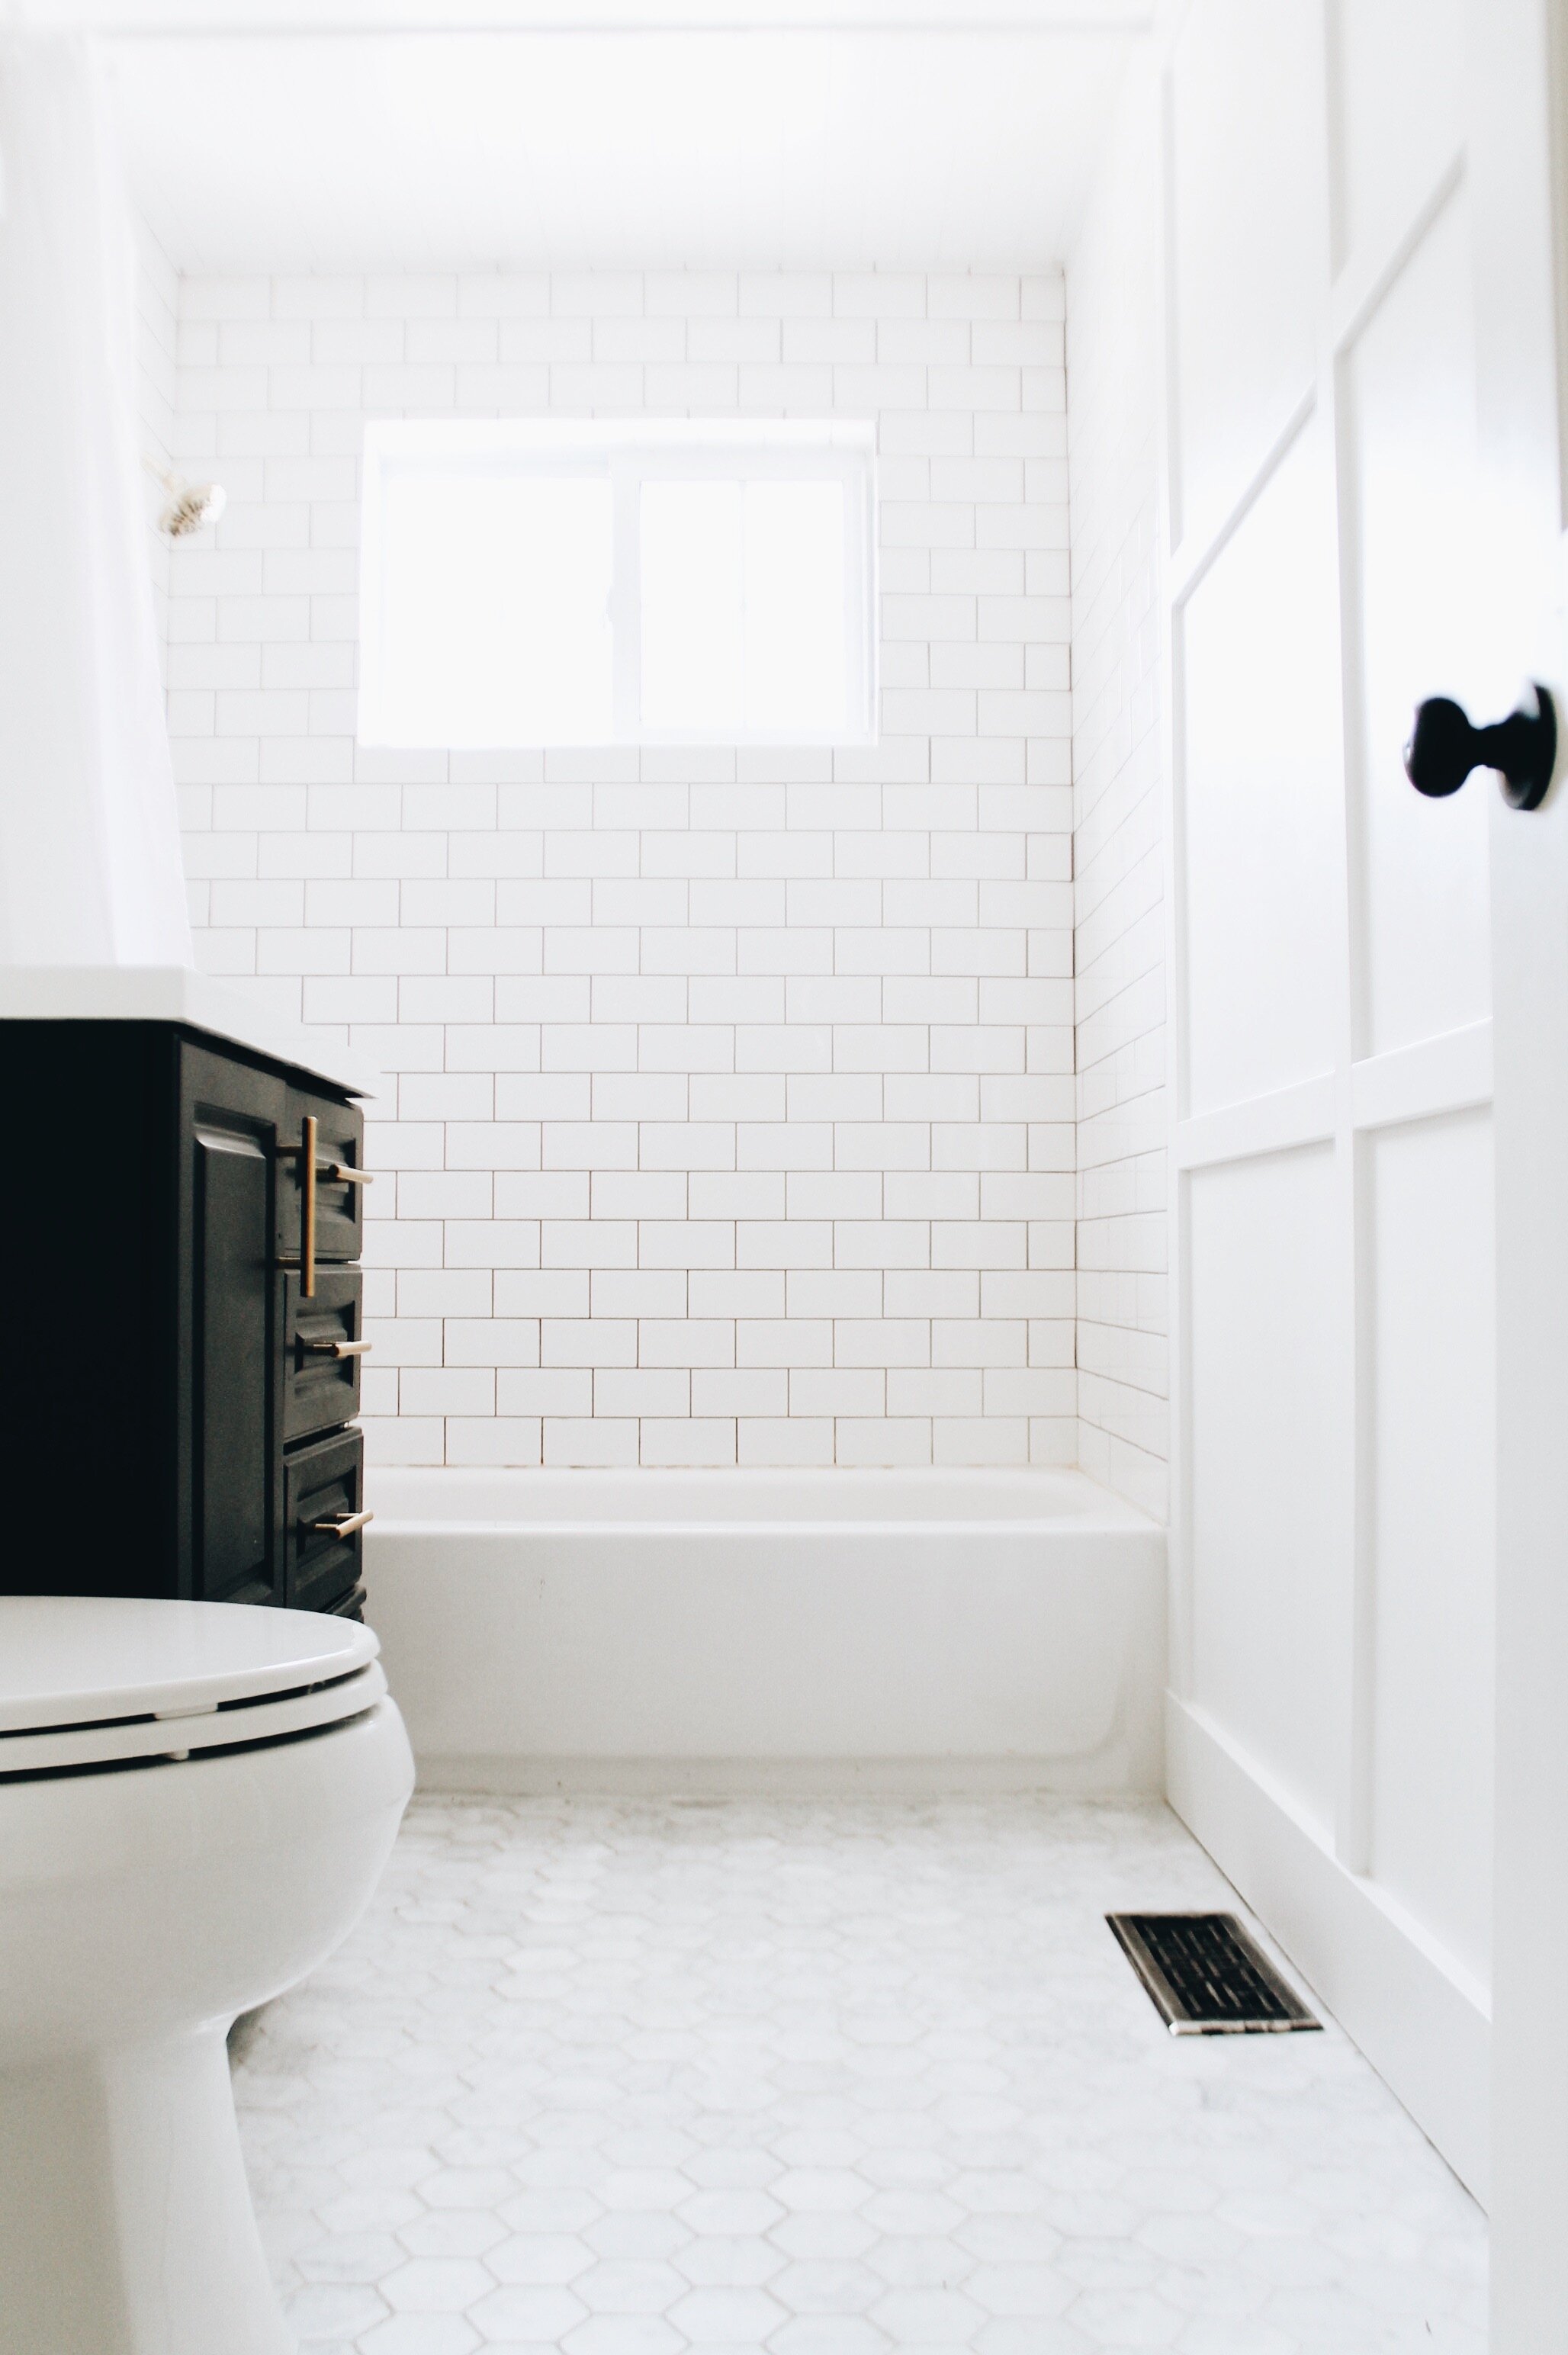
A brand new bath on the cheap! The whole thing was under $1,000, which is so insane for the look, and we did it ourselves! So proud. You can do this too.

We did phase 1 soon after we moved in. See what we started with in this post here. The things we did then: removed the sliding tub, tiled the shower, installed vinyl floors, painted walls, removed medicine cabinet, replaced the mirror, replaced light fixture. When I type all that out I forgot how much we did there! It served us well for two years and now with spending so much time at home during the pandemic it was time to tackle it. (Side note: in hindsight I wish I had tempered my expectations or timeline with two small children at home and a mini remodel without childcare. That was a mistake. But we learned! And it’s finished now which is great. But it took longer than expected.)

When starting the design process, I broke it down into 4 major decisions: walls, toilet, vanity, floors.

WALLS

The walls in our house are all textured (it’s a west coast thing), which I am not fond of but it doesn’t bother me enough to spend the time skim coating and repainting all the walls (this is not our forever home). But since the bathroom was a small space we could change it more easily. We considered a couple options including vertical paneling, but went with a board and batten. I love the elevated look it gives. For a second there I considered a colored paint like a green, but when Daniel got on board (ha!) with the proejct I decided to keep it white for simplicity, and I love that’s the different textures makes the white look interesting.

TOILET

I had heard good things about a specific one by Kohler, but at $400 and not our forever home I thought I could save a little money here. We went with this one, same technology and measurements, just no crown molding, for half price, and it was on sale when we bought it for $180.

VANITY

I started to research vanities and realized they are so expensive. I liked the storage we had in our existing one, just not the orange marble, so we considered a few options for keeping it and updating it. I discovered you can buy just the vanity top (!!!) which I had no idea about. We bought the vanity top ($119 at home depot), and it arrived cracked. I randomly searched OfferUp and found the exact style, still new in box, for $50 off, so I grabbed that one instead. Home Depot also had this amazing, matte gold, modern faucet (on sale for $59, down from $99, and still on sale at the time of writing this post!) so I grabbed that too. Hardware is this set and $12. So this means we spent a total of $142 on a totally new looking vanity while keeping the base. Such. A. Steal.

FLOORS

I pinned and pinned and considered so many options here, from poured concrete to all kinds of tile. I checked out some in person at Home Depot and Lowe’s, but the imitation marble didn’t look great to me and the real deal was so pricey. (If you have imitation marble, don’t worry, I lived with $30 STICK ON VINYL TILES for two years. You can live with anything, and it can be a great option for a budget bath.)

I was getting discouraged hitting dead ends but Daniel then suggested I check out OfferUp since sometimes people get rid of tile after a project, and I absolutely LUCKED OUT. The first one that popped up for me was a set of Bianco Carrara marble by Z tile, a specialty tile shop with showrooms in Portland and Seattle (this is the fancy stuff), in the exact square footage I needed, the color I wanted, brand new in box. It retails at $1200 and I got it for $200. I picked it up in a socially distanced hand off that night. The other bonus, besides being gorgeous tile from Italy at a fraction of the cost, is that I was able to get it immediately instead of waiting two weeks for the other style I had in mind at Home Depot. Man did I luck out. We have a friend named Tad who is always finding these incredible deals on things, from home furnishings to sailboats, and we call it “Tad Luck,” but it was my turn for an “Allie Luck” with this one.

CEILING:
You can’t see it in these photos, but the ceiling is detailed in narrow shiplap. This was something extra that we hadn’t originally considered, but am so glad we did. It’s 1 x 2.5” primed MDF boards. We painted/caulked/filled them after installing. It adds so much interest and a custom look to the space for cheap.

Now to talk dollars:

BUDGET BREAKDOWN:

Wood total for both ceiling shiplap and wall paneling: $200

Marble flooring: $200

Vanity update: $142

Toilet: $180

Skim coating: $30

Paint: $25

TOTAL: $752.

I also have to mention/include that we tiled the shower when we first moved in (and replaced the mirror and lighting), and I didn’t factor those into costs here, so that would be another chunk. I STILL think it comes out around $1,000 and change though. Labor costs on all of it were zero since we did it ourselves, which was a huge savings.

There you have it! A brand new, luxury looking bath you can do yourself for a fraction of the cost.

Wall paint color details: Simply White by Ben Moore.

HOUSE UPDATE 1: DOORS, CABINETS, AND PAINT

We're knee deep in house updates, and one of the first things we did before we moved in was paint. We painted doors, walls, trim, and kitchen cabinets, and it took us five weeks of evening and weekend work.

The walls were originally a grey-blue. Not bad, but not my favorite. A friend saw it while we were in the process of painting and thought we were crazy to paint it, her house interior was painted that grey-blue, just like nearly every other house in Seattle (and in all honestly it wasn't that bad to begin with) but I wanted it white. It was a good lesson for me, in not listening to the noise or the trends or what your neighbor or your best friend likes, but doing what YOU like. It's your house, and you're the one who will be living in it.

On a similar note of not comparing, my house will not look like the overly-perfectly-styled images I pin because hello, I have a toddler and this is real life. So trying to find the balance of what I like and what is reality for us right now is where I'm at.

About the painting process:

We got lucky, and inherited beautiful, solid wood, heavy, original doors. We loved everything about them except the wood stain and the 90s gold hardware. We switched them out for white with black hardware, and the difference is amazing.

We painted them using this sprayer by Graco. We have a friend who used to be a professional painter and he helped us out with this one, as we were trying out a professional grade sprayer. It's heavy, but easy to use and wow, the effect is stunning. Like factory painted door fronts. I love it and am so glad to have used it.

Prep: we got a powder degreaser (comet is similar), and scrubbed the fronts. We didn't sand them because they were new and had heard from another friend who had just done their cabinets and didn't sand, and we've seen those and they looked great to us so we went for it and were glad we skipped that step.

Since it was wintertime in the pacific northwest, we had to work inside, otherwise we would have done this outside or in a garage. We completely taped off an interior room with dropcloths and set up two sawhorse workstations. (We did have some overspray, so make sure you're in a room where you can easily get that off of surfaces.)

We sprayed cabinets (with hardware removed) in two rows. We'd spray a light coat, turn up the heat, wait 1 hour, spray a second coat, wait 24 hrs, then remove. Some tricks for the sprayer are to: use it far away, use continuous motions, wear a mask, start spraying before you get on to the wood, spray until you're all the way off of it, wear clothes you don't mind getting ruined (because they will), and have a strategy for how you will enter/exit the room. Also pay close attention to cleaning instructions. After each second coat we'd rinse out the paint can and take apart the pieces to wash and dry.

We did all 39 cabinet fronts, from this ikea wood to white, and I like that the fronts have some edge detail to them and aren't just plain.

About the paint:

We like Home Depot for the price, and we color match all the higher-end brands to their Behr interior paint. Our door color is Benjamin Moore Simply White in Behr semi-gloss interior paint. Our trim right now is off the shelf white, which I'm not sure if you can tell from the photos, but is a bit brighter than Simply white and the trim around the doors will be going to Simply White once we find the time, it's not high on our priority list at the moment. Our walls are Farrow and Ball Strong White in Behr eggshell. I love love these whites. The wall color is beautiful, almost a greige. It has quite a bit of color in it for a white which gives it the depth I was looking for. Simply White is a creamy white and we did that on the kitchen cabinets as well as the doors. It contrasts nicely with Strong White.

About the cabinet hardware:

We chose Atlas hardware in Elizabeth in matte black, in a size that would fit our existing pulls so we wouldn't have to deal with drilling new holes. I love this hardware and I think it looks timeless. Kind of like a polished modern farmhouse. We went with them for our house numbers too. Love the look. They have tons of finishes, and for a second there I almost went with the gold, but liked that the black looked a little more industrial/mom of a toddler/work horse kitchen. It suits us.

About the door hardware:

We choose Stone Harbor Hardware in Highland in vintage bronze finish. I love the contrast of the bronze hardware with the white doors. Stone Harbor was so nice to work with, this company will even match an existing key to your new door lock, you can mail it to them and they send it to you ready to go. These knobs are high quality and beautiful, totally recommend. They were so generous to extend a discount code here, use code ALLIES10 for 10% off everything through January 31st.

Here's a fun before and after for you. Just paint and hardware updated and look at the difference. Incredible!

Our house numbers got a quick upgrade too. We stuck with matte black and went for a traditional look with these by Atlas.

Once the walls, door, cabinets, and trim were painted, hardware was placed, and doors were hung, we moved in. Now we're onto everything else: lots of decorating to do, light fixtures to switch out, subway tile to place, art to hang, kitchen flooring to plan, and a million other things. Enjoying the messy middle where we're at because as Brené Brown says, that's where the magic happens. Stay tuned!

Thank you to Graco, Atlas, and Stone Harbor for partnering with me on this post.