DIY BATHROOM REMODEL

52B0E540-04C6-4416-B3F0-475C8F696E5F-D643208B-B665-4FA6-9176-A0B5134E5504.JPG

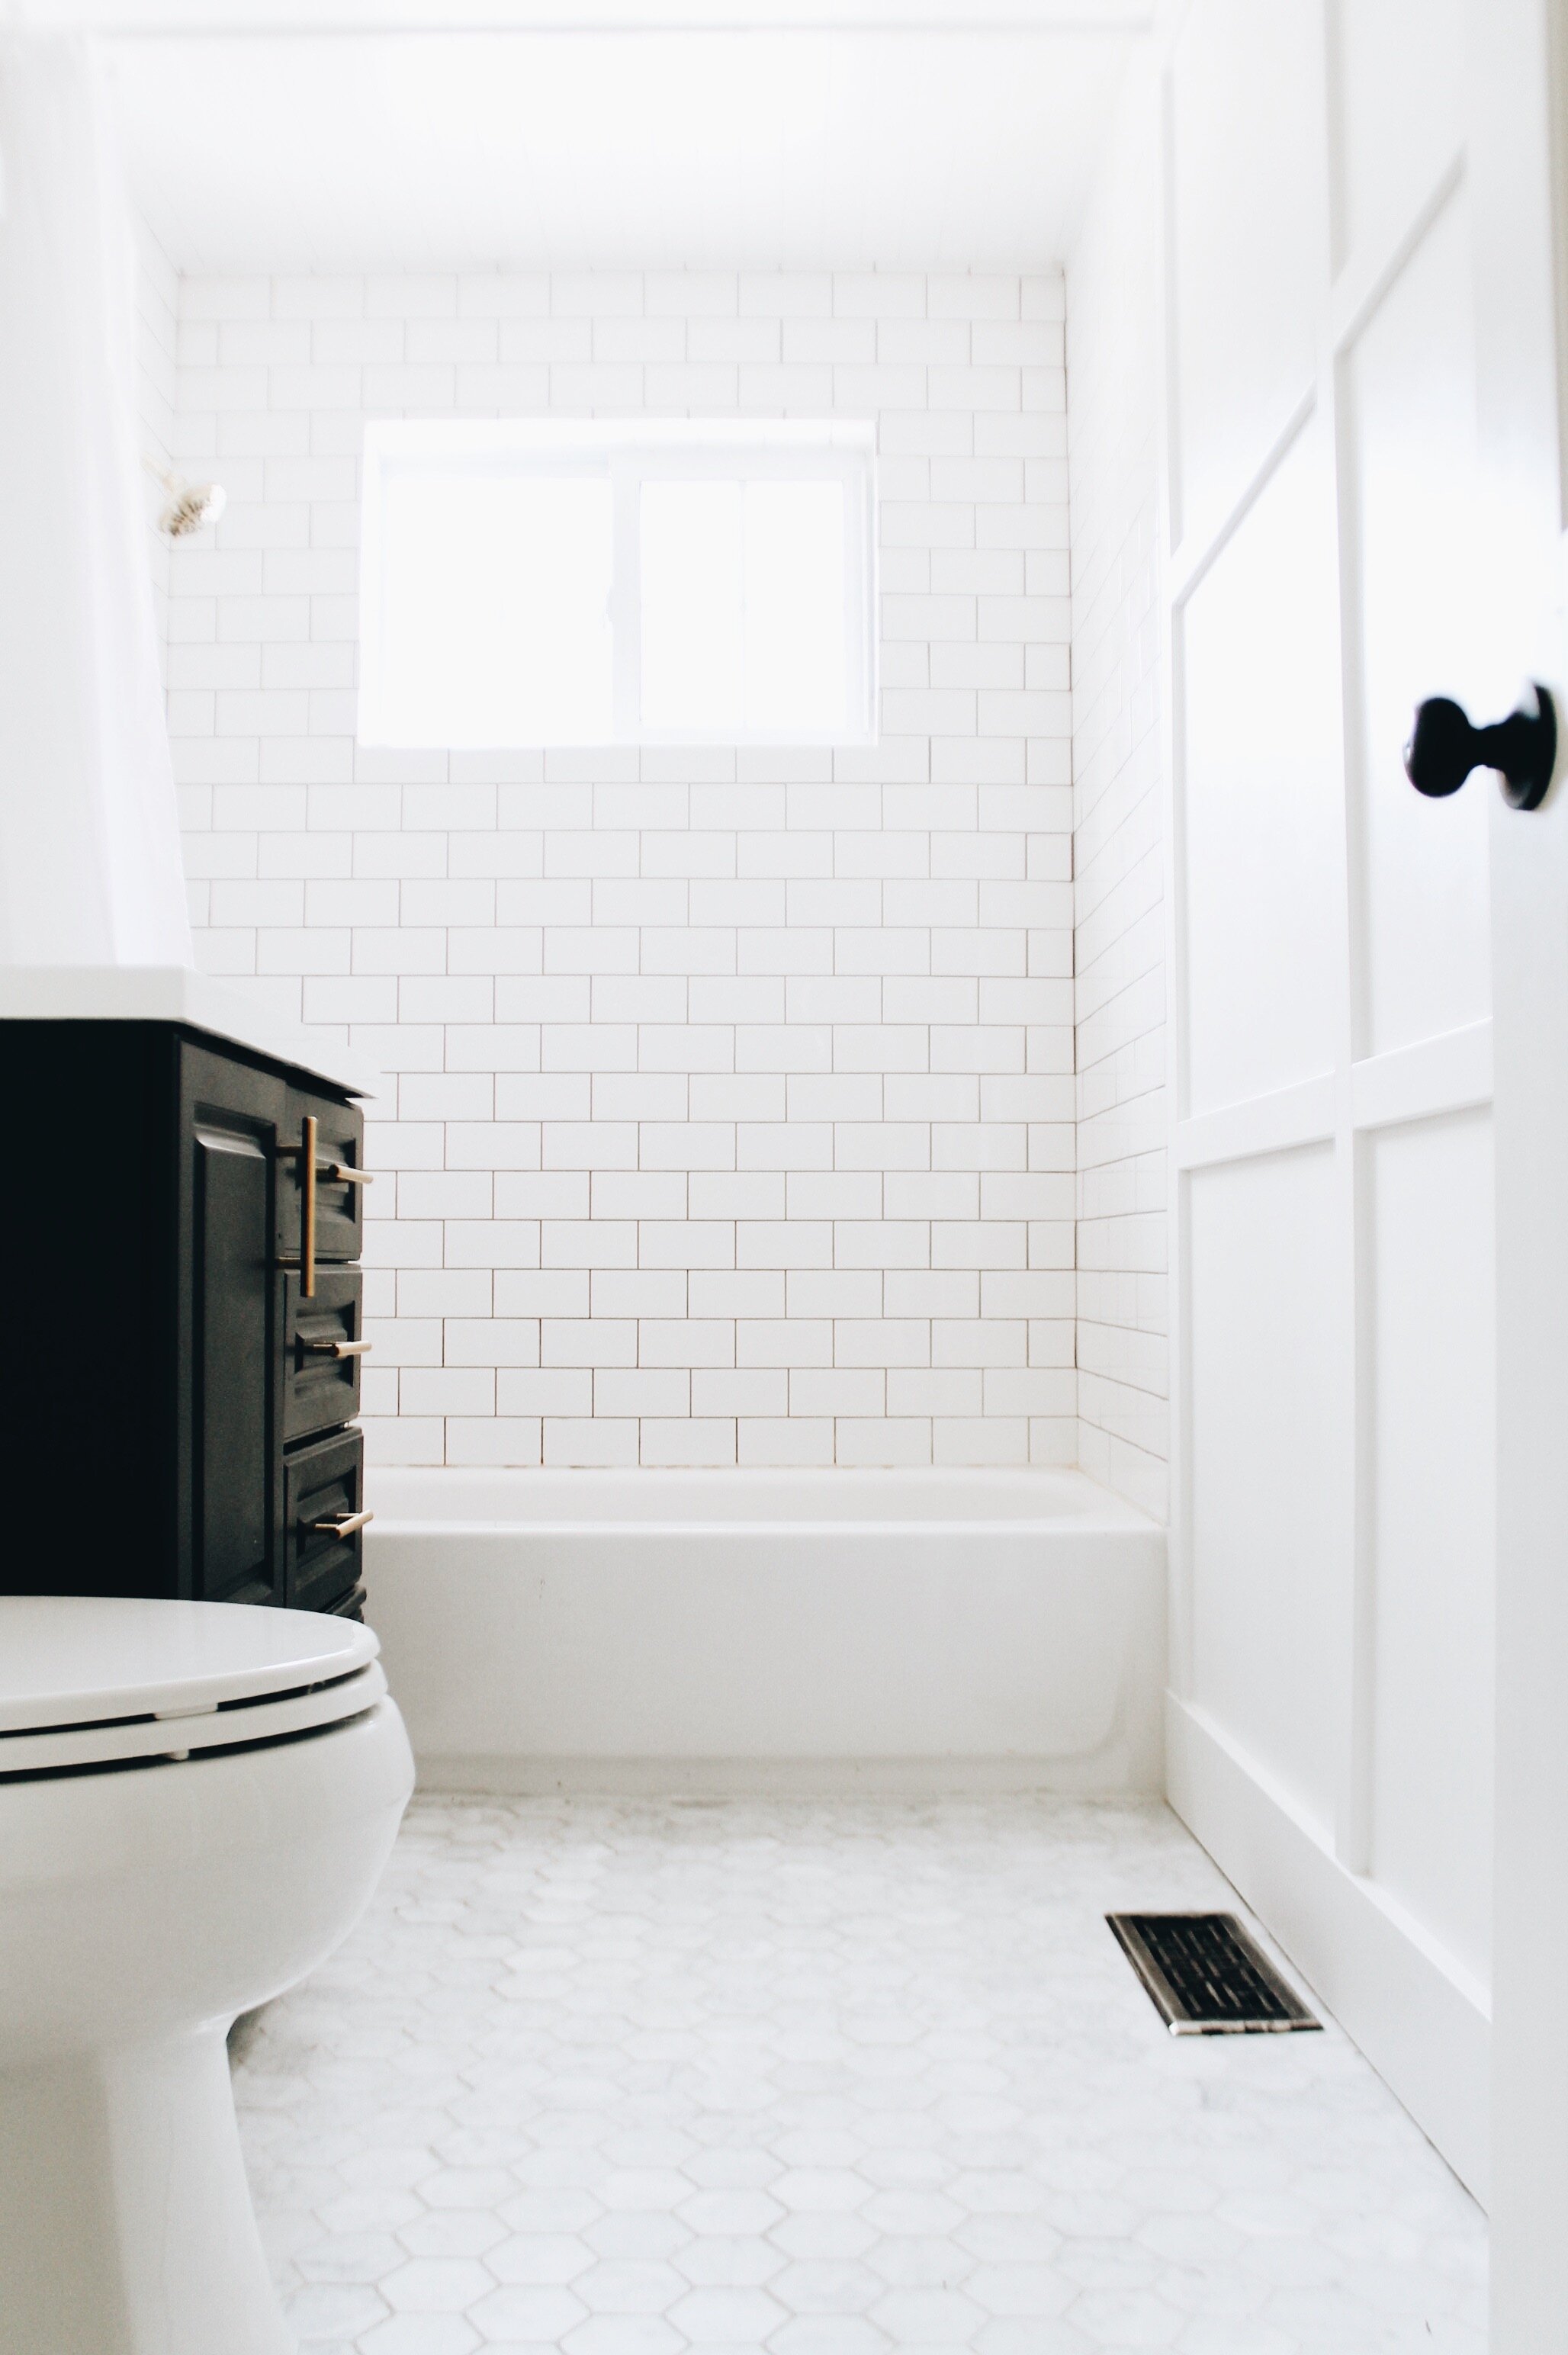
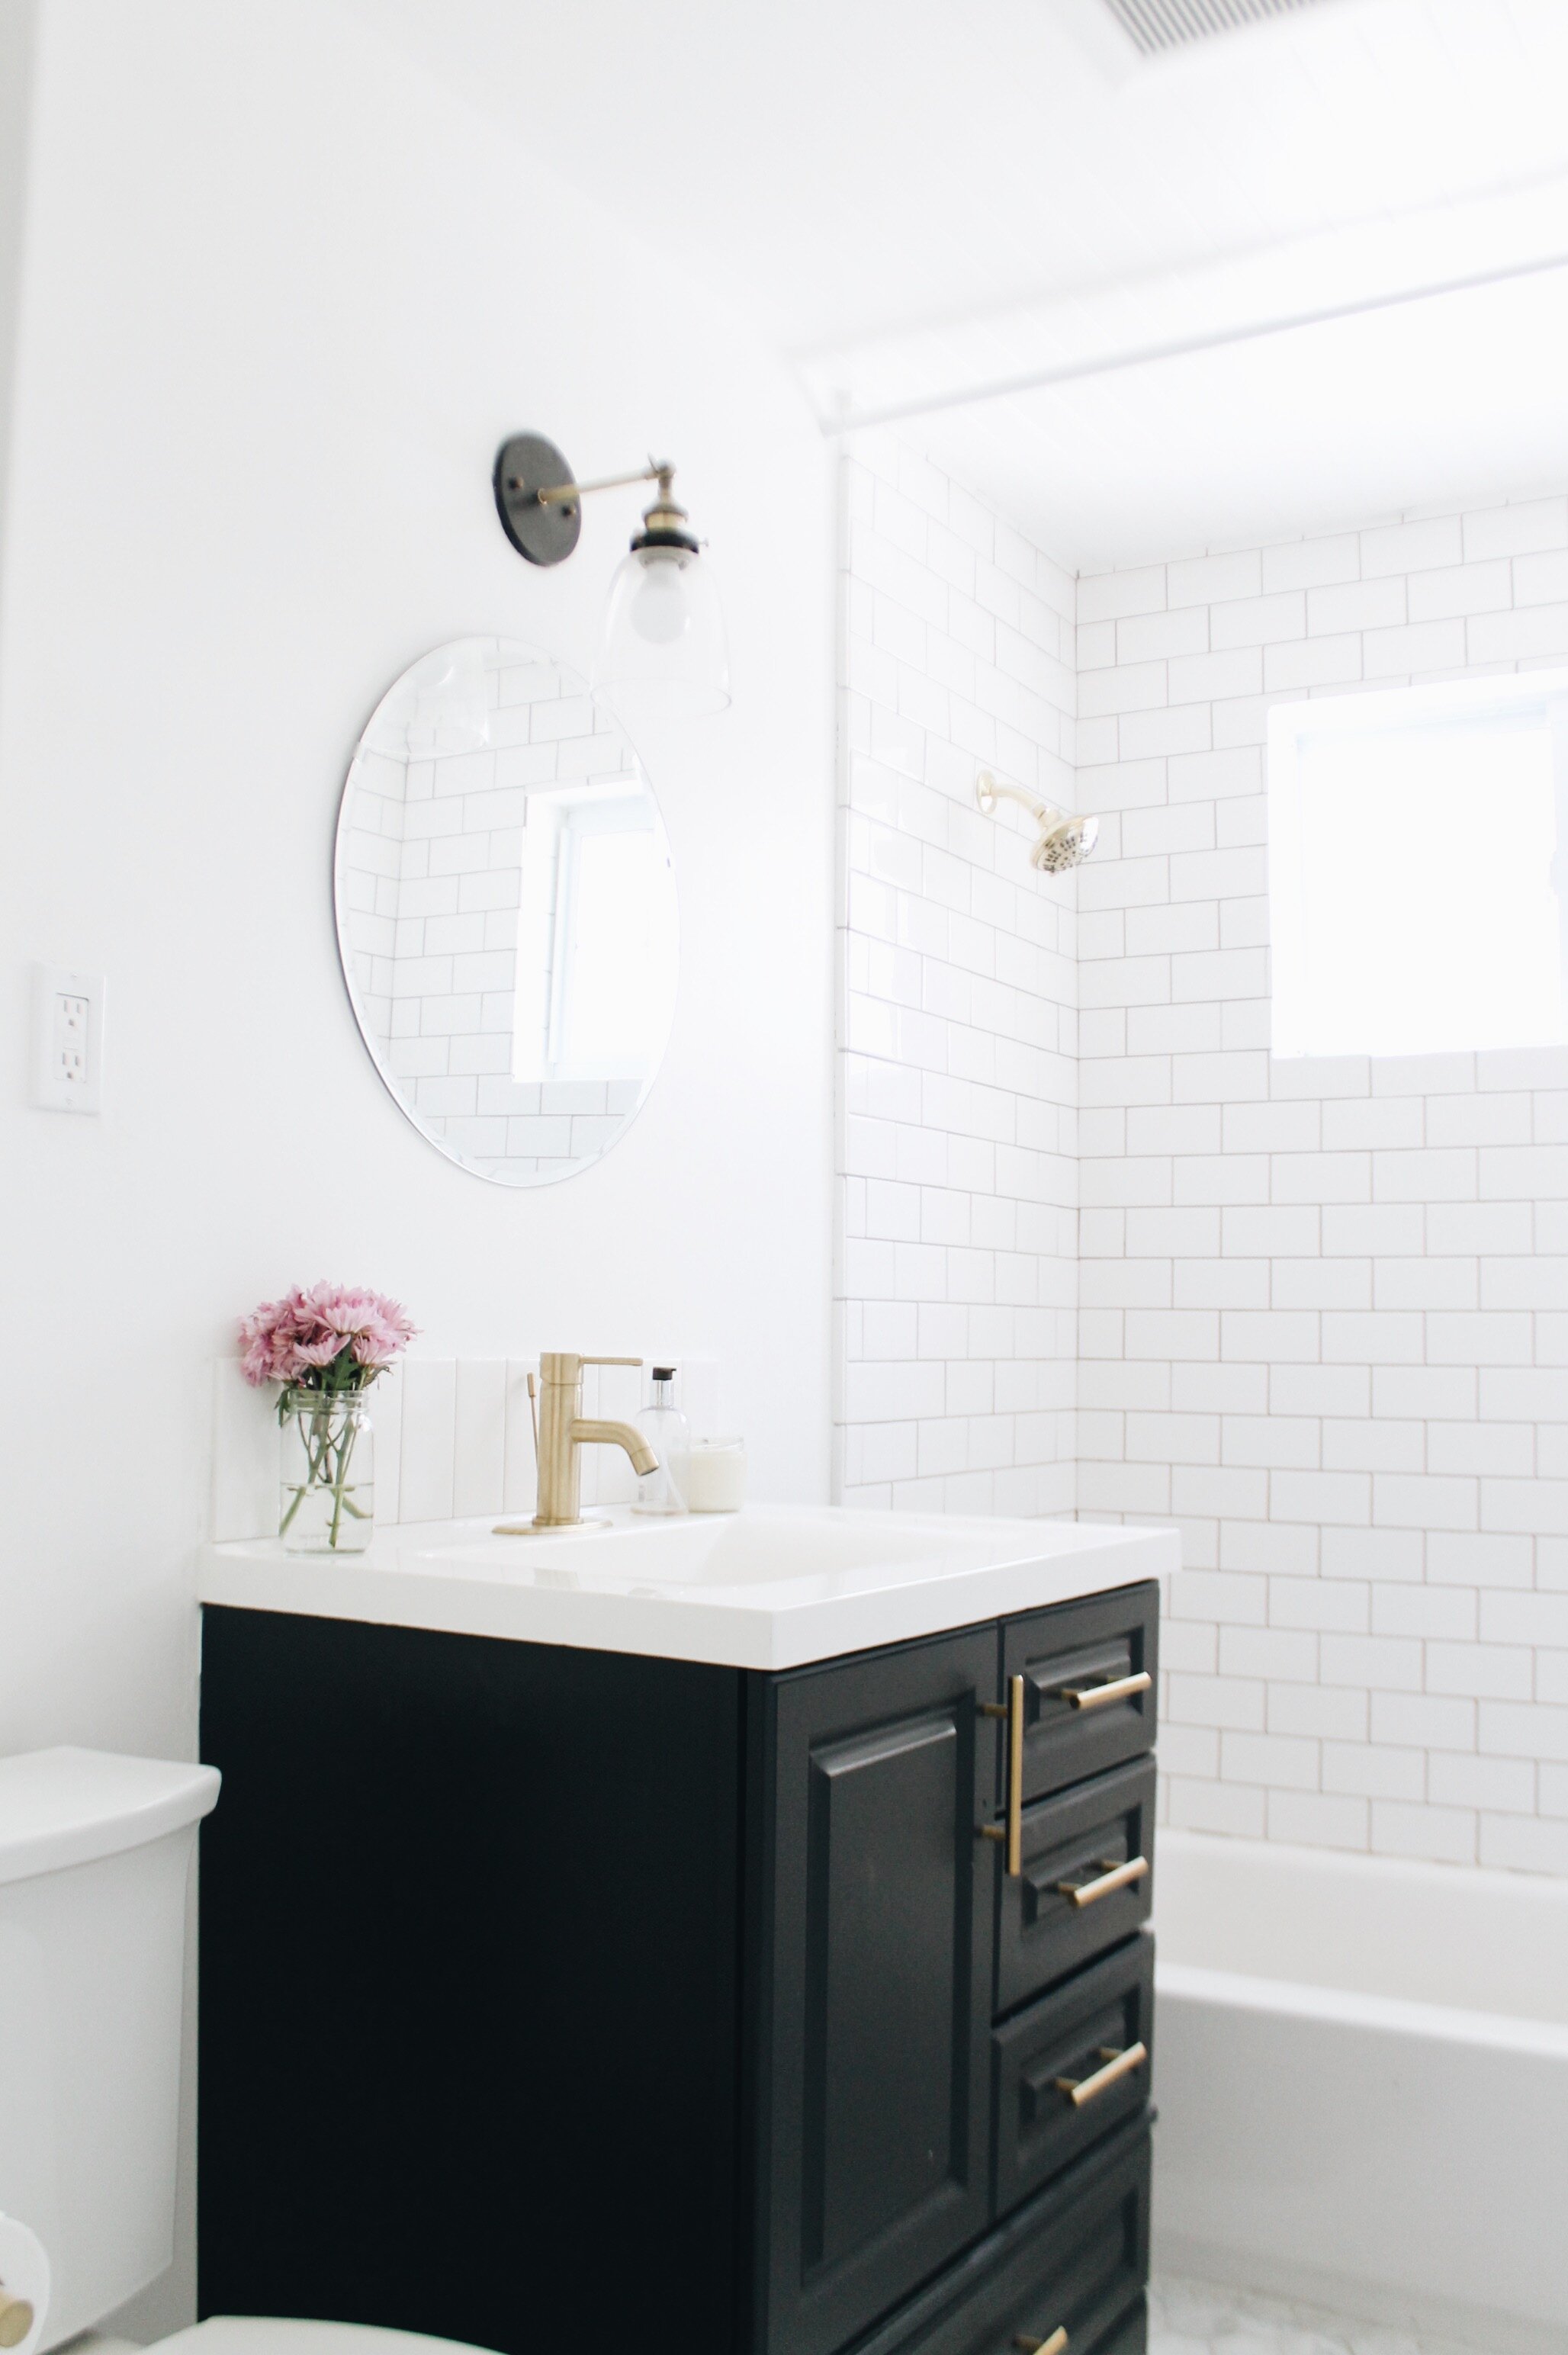
A brand new bath on the cheap! The whole thing was under $1,000, which is so insane for the look, and we did it ourselves! So proud. You can do this too.

We did phase 1 soon after we moved in. See what we started with in this post here. The things we did then: removed the sliding tub, tiled the shower, installed vinyl floors, painted walls, removed medicine cabinet, replaced the mirror, replaced light fixture. When I type all that out I forgot how much we did there! It served us well for two years and now with spending so much time at home during the pandemic it was time to tackle it. (Side note: in hindsight I wish I had tempered my expectations or timeline with two small children at home and a mini remodel without childcare. That was a mistake. But we learned! And it’s finished now which is great. But it took longer than expected.)

When starting the design process, I broke it down into 4 major decisions: walls, toilet, vanity, floors.

WALLS

The walls in our house are all textured (it’s a west coast thing), which I am not fond of but it doesn’t bother me enough to spend the time skim coating and repainting all the walls (this is not our forever home). But since the bathroom was a small space we could change it more easily. We considered a couple options including vertical paneling, but went with a board and batten. I love the elevated look it gives. For a second there I considered a colored paint like a green, but when Daniel got on board (ha!) with the proejct I decided to keep it white for simplicity, and I love that’s the different textures makes the white look interesting.

TOILET

I had heard good things about a specific one by Kohler, but at $400 and not our forever home I thought I could save a little money here. We went with this one, same technology and measurements, just no crown molding, for half price, and it was on sale when we bought it for $180.

VANITY

I started to research vanities and realized they are so expensive. I liked the storage we had in our existing one, just not the orange marble, so we considered a few options for keeping it and updating it. I discovered you can buy just the vanity top (!!!) which I had no idea about. We bought the vanity top ($119 at home depot), and it arrived cracked. I randomly searched OfferUp and found the exact style, still new in box, for $50 off, so I grabbed that one instead. Home Depot also had this amazing, matte gold, modern faucet (on sale for $59, down from $99, and still on sale at the time of writing this post!) so I grabbed that too. Hardware is this set and $12. So this means we spent a total of $142 on a totally new looking vanity while keeping the base. Such. A. Steal.

FLOORS

I pinned and pinned and considered so many options here, from poured concrete to all kinds of tile. I checked out some in person at Home Depot and Lowe’s, but the imitation marble didn’t look great to me and the real deal was so pricey. (If you have imitation marble, don’t worry, I lived with $30 STICK ON VINYL TILES for two years. You can live with anything, and it can be a great option for a budget bath.)

I was getting discouraged hitting dead ends but Daniel then suggested I check out OfferUp since sometimes people get rid of tile after a project, and I absolutely LUCKED OUT. The first one that popped up for me was a set of Bianco Carrara marble by Z tile, a specialty tile shop with showrooms in Portland and Seattle (this is the fancy stuff), in the exact square footage I needed, the color I wanted, brand new in box. It retails at $1200 and I got it for $200. I picked it up in a socially distanced hand off that night. The other bonus, besides being gorgeous tile from Italy at a fraction of the cost, is that I was able to get it immediately instead of waiting two weeks for the other style I had in mind at Home Depot. Man did I luck out. We have a friend named Tad who is always finding these incredible deals on things, from home furnishings to sailboats, and we call it “Tad Luck,” but it was my turn for an “Allie Luck” with this one.

CEILING:
You can’t see it in these photos, but the ceiling is detailed in narrow shiplap. This was something extra that we hadn’t originally considered, but am so glad we did. It’s 1 x 2.5” primed MDF boards. We painted/caulked/filled them after installing. It adds so much interest and a custom look to the space for cheap.

Now to talk dollars:

BUDGET BREAKDOWN:

Wood total for both ceiling shiplap and wall paneling: $200

Marble flooring: $200

Vanity update: $142

Toilet: $180

Skim coating: $30

Paint: $25

TOTAL: $752.

I also have to mention/include that we tiled the shower when we first moved in (and replaced the mirror and lighting), and I didn’t factor those into costs here, so that would be another chunk. I STILL think it comes out around $1,000 and change though. Labor costs on all of it were zero since we did it ourselves, which was a huge savings.

There you have it! A brand new, luxury looking bath you can do yourself for a fraction of the cost.

Wall paint color details: Simply White by Ben Moore.

S'MORES FAMILY COSTUMES

Leaking our costumes early this year! Wanted to share this idea in case you’re looking for an easy, affordable ($11 total!), one-hour, family Halloween costume from things you probably already have on hand.

Trey had his first s’more this summer when we were camping and he was hooked, which inspired this costume idea. His dentist asked him at his checkup in July, “Have you gone camping yet this summer?” And Trey said “Yes and actually I’ve been eating lots of s’mores!” What a thing to disclose to your dentist, ha! Thankfully no cavities yet. ;) Here’s how we did it:

The Hershey’s bar is felt, I bought one yard ($4), but you could get away with so much less, especially for a pint-sized person. We measured to his knees and cut one rectangle, there is a square opening at the neck. We glued two small fabric panels at the sides with stick on velcro to make it more “fitted,” but those aren’t necessary. I bought two packs of iron-on letters ($3 each) and attached those to the front.

Trey’s pants and top are pjs that he can get use out of long past Halloween. (He’s also wearing this hoodie because our Halloween night is really chilly here in the PNW.) Love these pjs! Like most non-flammable organic ones, they are meant to be worn fitted. I like to size up one size to get the most wear.

Blaire’s marshmallow is a zippered footie stuffed with baby blankets and she is also wearing this hat.

My graham cracker is a piece of cardboard we had, cut to a square, with added dots and a dash down the center in permanent marker. I used gorilla glue to attach one long strip of extra brown felt so that it would hang around the back of my neck. Add black pants and a black top and you’re set (Pro tip: if you can fit an adult XS you can sometimes fit a youth 14! I do this often with organic pjs because they are often much cheaper than the adult sizes.)

This is my favorite family costume we’ve done yet because this year we grew by one! Still hard to believe. So excited for Thursday.

Thank you primary for partnering with us on this post. A great economical way to stretch your Halloween costumes to get use year-round.

ON MAKING DESIGN MISTAKES

This is the first house we've owned, and probably not the last, so I'm trying to think of it as our "mistakes" house. I get to try out different designs, and see what makes sense for us versus what I see on Pinterest. I've already had a few "teachable moments" of design decisions that I would have done differently.

Take, for instance, that shelf on the mantel. It was wood before we moved in, and in an effort to get away from all the 90s wood trim and doors, everything was going either white (all walls and doors ) or black (hardware). So, white it went. It looked good against the then grey/blue walls, but once everything else was white, I realized I needed to add a little warmth back in. I assumed it was a done deal but Daniel knew of a way to get it back, by heating it, scraping it, and sanding it. He did it over the course of two nights, and the cost? Zero dollars, since we already had the tools. It was a little painful seeing all those layers of paint come off, but I knew that this time, I had the space to consider all my options and I knew that I was making the right decision. As a bonus, I didn't love the tone of the wood pre-paint (which is why maybe I was motivated to change it), but now that it's sanded to a lighter color, I love it. It's the shade my wood mantel dreams are made of. Had I not mistakenly painted it I wouldn't have known about this amazing color underneath.

My second design mistake here was that I have clear, glass sconces which I assumed only Edison bulbs would look good in. Went for it. Decided I didn't like the orange-y hued lighting. So I researched all my options, and I didn't think this was possible, but I am crazy about these light bulbs. I can control them from my smart phone and the color temperature is completely custom, meaning I can make it cooler or warmer depending on the season/time of day/mood etc. So happy with them. They even look great in the clear glass which I was concerned about. Welcome to 2018 - when you can order anything online to be delivered to your house in 2 days and control the temperature shade of your light bulbs from your smart phone.

So, my lessons learned: try everything. You sometimes don't know if you like something until you see it in your own house, in your unique lighting, with your unique family. And, secondly, if you don't like it, it's probably changeable. Thankfully, home decor is not open heart surgery. If the stakes feel high, it's because we've placed that unnecessary pressure on ourselves to have these Pinteresty-perfect homes, when in reality, there really isn't a lot at stake here. It's home decor! If you try and it and don't like it, change it. This is our first house. I get to "try on" everything here, and the mistakes just mean I'm closer to finding my style and what works best for my taste and my family.

BEFORE: Beautiful, but stark and not enough contrast.

AFTER: Warmth! Texture! Variation! Love the change.

Shared in partnership with Poly and Bark, who makes the Camberly sconces, and Hue Bulbs, who makes the light bulbs.